Cannot Verify Server Identity
Cannot Verify Server Identity
In the case of using email and suddenly it appears: Cannot Verify Server Identity, make the following corrections:
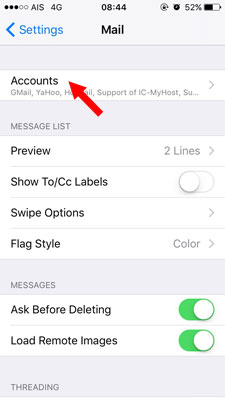
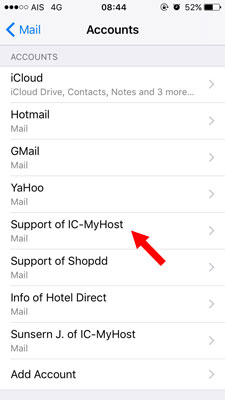
1. Go to Settings, then select Mail and Account as shown in the picture below.


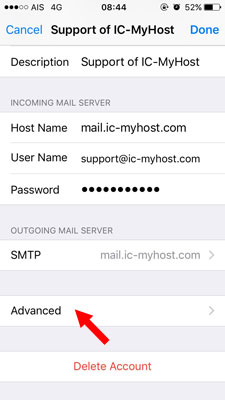
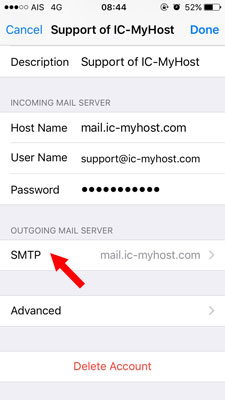
2. Then select the email with the problem and enter SMTP in the PRIMARY SERVER section, as shown in the picture below.
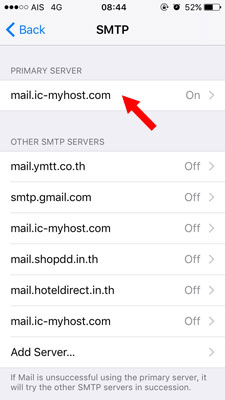
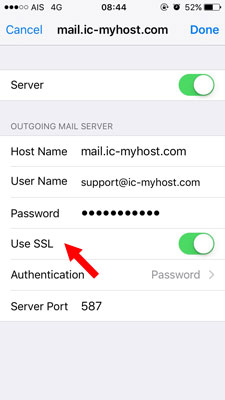
3. Close the Use SSL section and press Done.
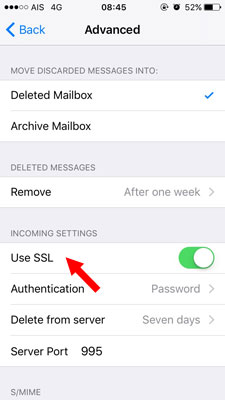
4. After that, go to Advance again and turn off Use SSL in the INCOMING SETTING section.